DIY // Not-Quite-Ring Lights

By Tim Wu on April 30, 2012 in Uncategorized
1
0

I recently assisted on a music video for artist Cindy Shaoul directed by Illium Pictures director (and fellow Tim Horton’s addict) Natasha Kermani. In pre-production talks while we were in Canada, she had mentioned the idea of a custom shaped ring light over lunch.

“FOR TOO LONG HAS MANKIND BEEN RESTRICTED TO CIRCULAR SHAPES OF LIGHTS,” she yelled in my face while I was trying to eat my steak salad. “VERY TRUE, WHAT AN ASTUTE OBSERVATION.” I yelled back. “HOW IS YOUR SALAD?” she asked. “IT’S NOT BAD.” I whispered, “I MEAN, IT’S A STEAK. ON TOP OF SALAD. YOU CAN’T REALLY MESS THAT UP. OOH, A SPECIAL ON MARGARITAS!!” 

Eighteen $5 strawberry and kiwi margaritas later, I found myself with the task of building a ring-light. 


One of my favorite contraptions in the world are the flexible LED strips that you can get at any of those Chinese lighting stores all over Manhattan (don’t even try to deny that they’re not all Chinese. SHOW ME A SINGLE ONE THAT ISN’T.) They’re decently inexpensive at $11/foot and come in all sorts of colors. Best part is you can run ‘em off a 9volt battery.

The back of the strip already has adhesive, so all you have to do is peel and stick. Here I’ve attached it to a strip of Velcro, and use it as a light for the inside of my Arri bag~


The end of the strip has a positive and negative wire that you can wire to what have you. LIKE A POTATO. But in this case, it’s wired to a basic rocker switch, and then to a 9v battery clip, all available at yer friendly neighborhood RadioShack. 

The strip has open positive and negative contacts every three LEDs, so you can cut the strip at any of these points and just wire the contacts back together. So for this project, when asked if I could make a triangle, I had myself a hearty laugh and replied, “MAYBE!” (because I hadn’t actually done this before)

But HEY. Turns out it worked:


Each 9 LED strip is simply connected together by soldering a wire to each contact to bridge the circuit, with the last strip leading out the bottom to the same rocker switch and 9V battery clip set up I have in my Arri bag. And why yes, that is just a frisbee with a hole cut in it. IT’S A PROTOTYPE OKAY? THE PRODUCTION MODEL WILL BE MILDLY PRETTIER.  


To attach to rods, I screwed on a 15mm riser that I had lying around, which allowed me to adjust the height to match different lenses. 


Here it is fired up. The three lights on the corners are individual battery powered LEDs. They helped accentuate the corners in the reflection. Here you can see the wires that connect each LED strip.

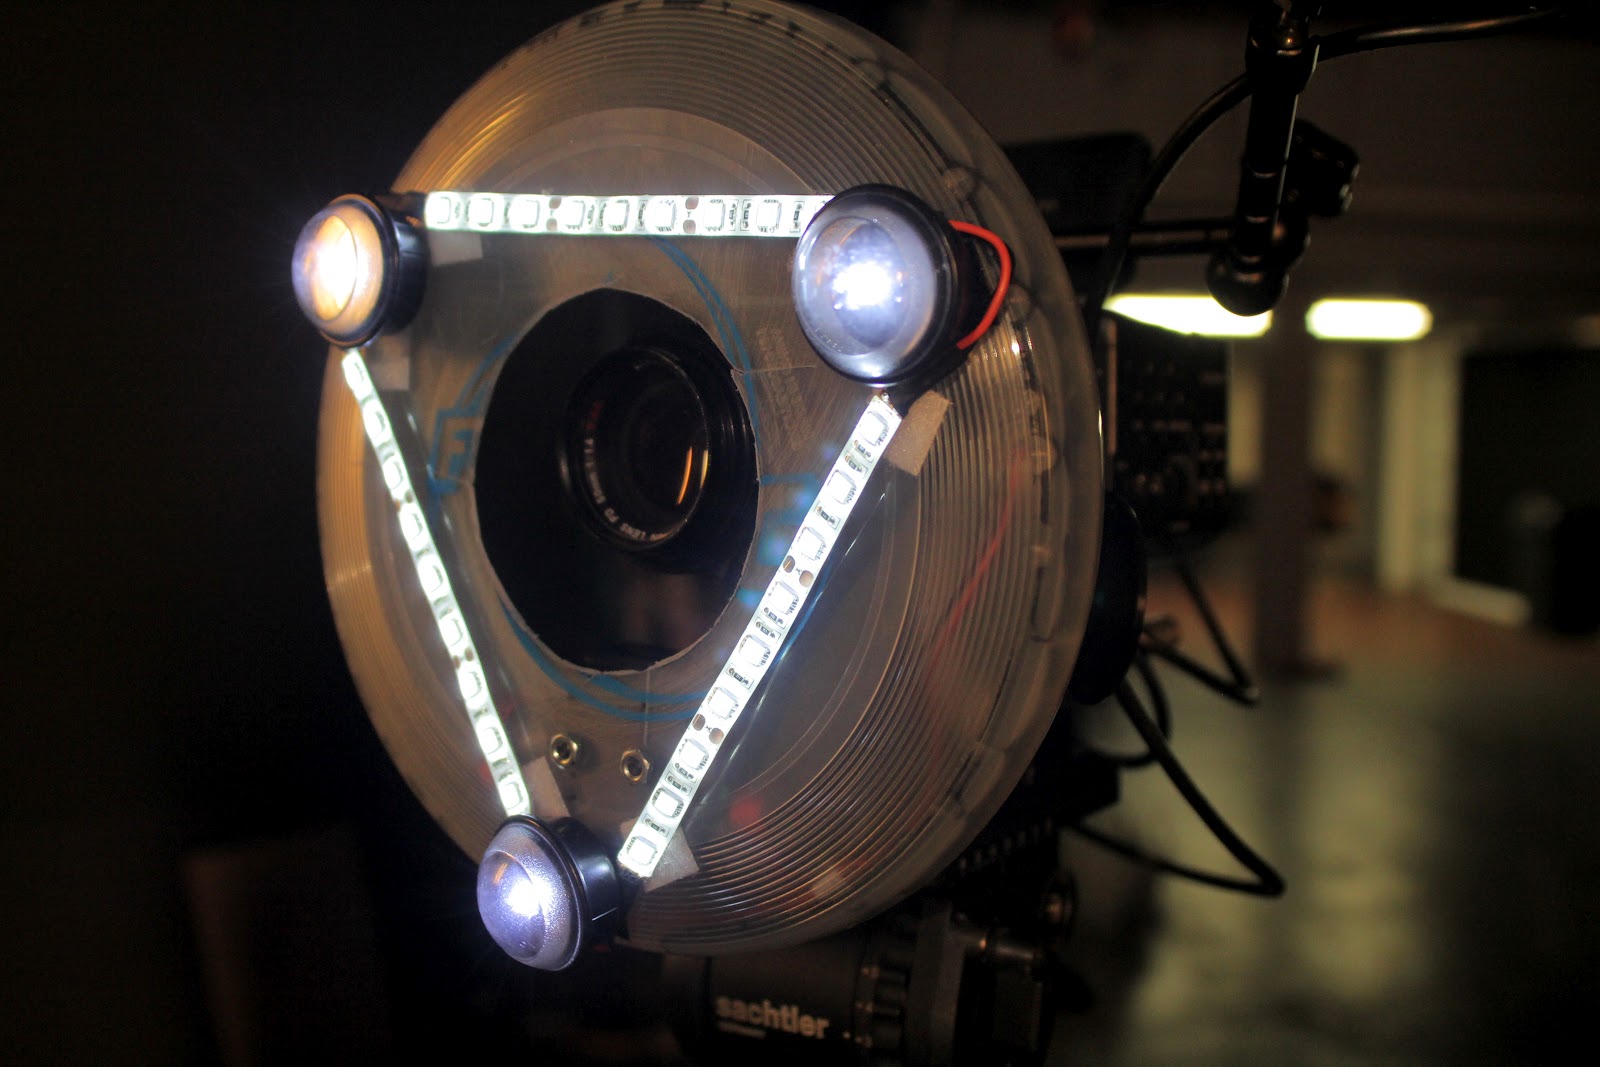
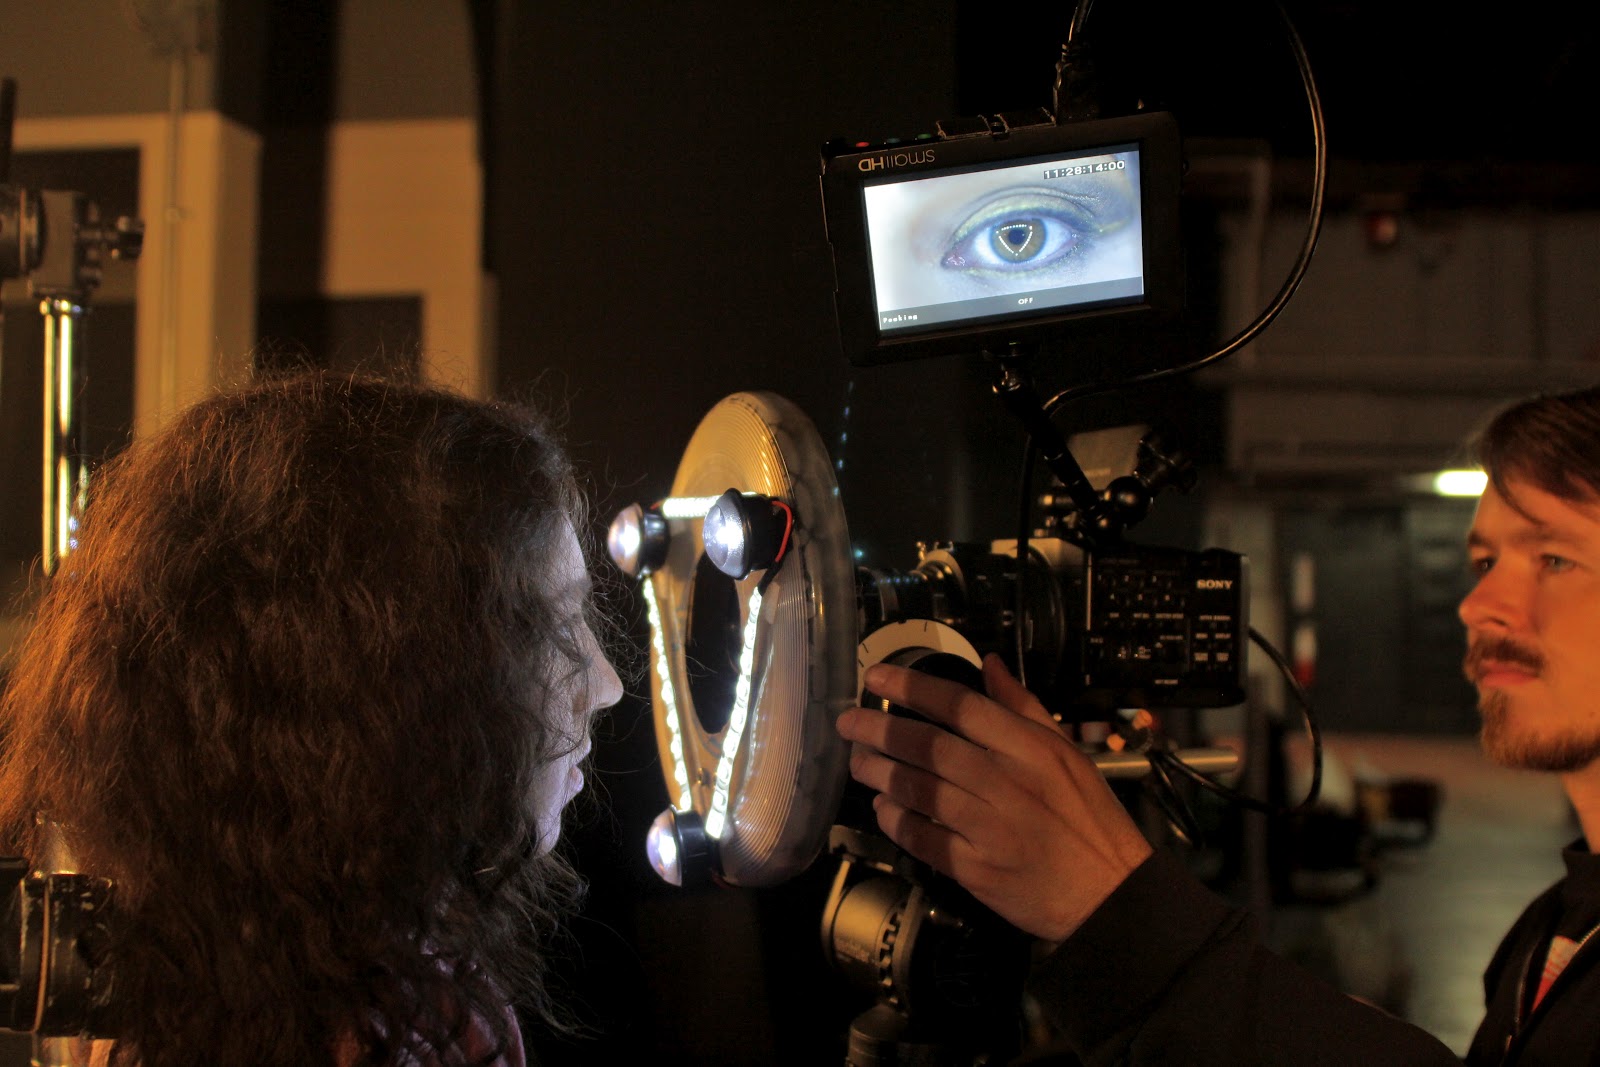
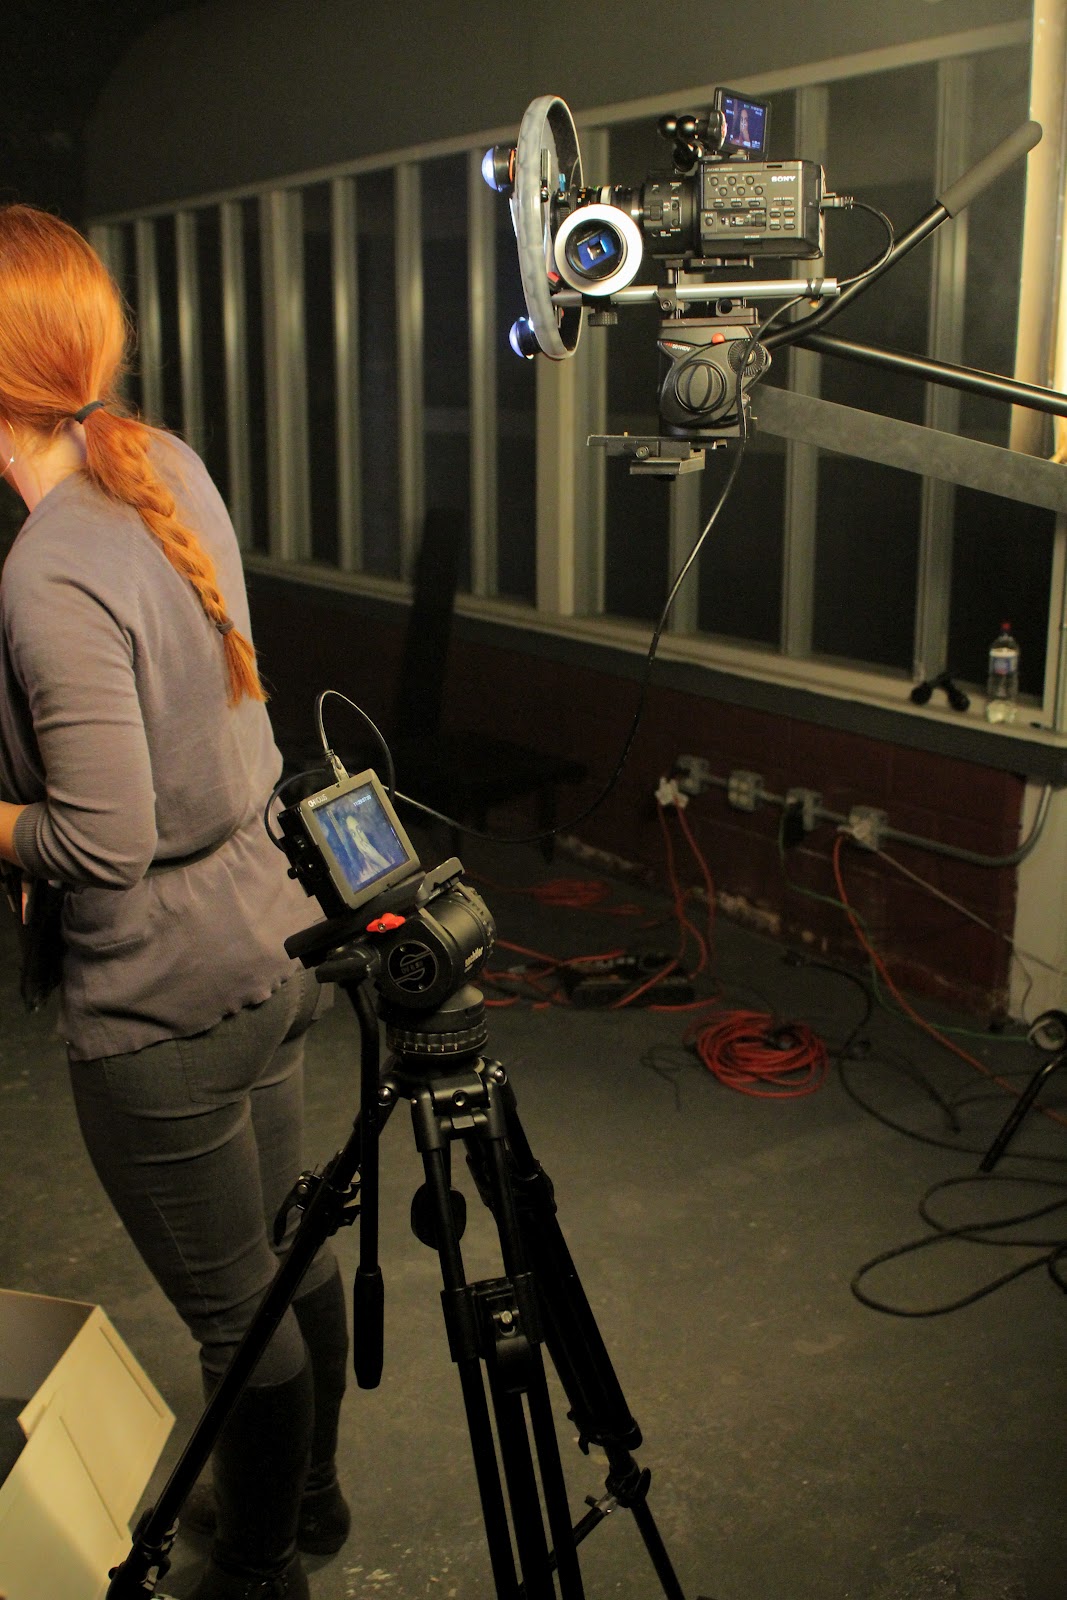
Here’s the main shot we used it for, a macro shot of Cindy’s eye. This is on a Canon FD 50mm w/ 2x Extender on a Sony FS100. I’ll post a still from the final result when they get into post, but you can get an idea of the effect in the monitor above. That’s Travis Tips, the DP, grabbing focus because I was taking the above photo for this blog, which was obviously far more important. 


On the bottom left corner, you can also see a gobo arm that Cindy is leaning against. For shots like these where the focus is super shallow, this helps the actor keep their position. This technique is also useful for shots where an actor’s hand or other body part needs to land in a particular spot, like an XCU of giving someone the finger.


And speaking of tricks o’ the trade, Sachtler tripods make good monitor stands as well when you don’t have a free hand but you really really want a cookie. 

 I had a lot of cookies that day. 

1 Comment

  1. Travis Tips May 1, 2012 Reply

    The cookies were very good. I should have eaten more of them.

Leave a reply

Leave a Reply to Travis Tips Cancel reply

Your email address will not be published. Required fields are marked *

You may use these HTML tags and attributes: <a href="" title=""> <abbr title=""> <acronym title=""> <b> <blockquote cite=""> <cite> <code> <del datetime=""> <em> <i> <q cite=""> <strike> <strong>